Tuesday, July 19, 2011

Low Carb Trail Mix

One of the things that can be difficult on a low carb diet is snacks on the go.  My selection of nuts and seeds does resemble a bulk foods section at the grocery store, but I still seem to get tired of just plain nuts.

This isn't really a true recipe since the best mix is going to be a blend of whatever you like the best.  Here is the blend that I tend to like the most:

2C Almonds
1C Peanuts
1C Sunflower Seeds
1C Unsweetened Shaved Coconut
1C Dried Cranberries (No Sugar added)
1/2C Unsweetened Carob Chips

Scoop 1/2C of the mixture into snack bags. Bags are 5-7 Carbs a piece.

Tips:
1. Hunt around until you can find no sugar added dried cranberries.  I ended up finding the lowest carb content cranberries in the bulk section at a local health food store.
2. Get shaved coconut because the texture works very well with trail mix as opposed to shredded.
3. Use one type salted nuts and the rest unsalted otherwise it will throw off the sweet/salty balance too much.
4. If you are taking the trail mix on a long hike or somewhere where it is going to get hot then consider omitting the carob chips otherwise they will melt in your hands and not your mouth.
5. Pack for a hike, road trip, picnic, movie theater snack, ect....

Friday, June 17, 2011

Low Carb Cheesecake w/Chocolate Ganache

Low Carb Almond Flour Crust:
1 1/2 C Almond Flour
1 Tbsp Whey Protein Powder
3 Tbsp Water
4 tsp Olive Oil

Mix together dry ingredients. Add wet ingredients and mix. The dough should not be too dry or too sticky, if so add more water or almond flour as needed.  Press into a greased pie pan with your fingers.  If you need to dip your fingers in ice water to keep the dough from sticking.  Use a fork to press the edges as shown below.


Bake @350°F for 15-20 min.  Cover the edges of the pie with aluminum foil until the last 5 minutes to keep the edges from burning.  The finished crust should be nicely browned and fragrant of toasted almonds.


Filling:
16 oz Cream Cheese, softened
1/2 C Sour Cream
1/2 C Yogurt
5 Packets Splenda
1 Tbsp Truvia
3 Eggs
1/3 C Butter - melted
1 Tbsp Vanilla

Whip cream cheese, sour cream, and yogurt in your mixer until smooth.  Beat in eggs one at a time.  Add butter vanilla, and sweetener and mix until blended smooth.  Pour filling into the pie crust and bake @350°F for 35 to 45 minutes.  The most difficult part was trying to tell when it was done.  I consulted several websites and I am still a bit confused.  I checked my cheesecake after 35 minutes and it was still very wobbly in the center but starting to brown.  After 45 minutes it was still a little wobbly but browned nicely on top so I took it out.  It apparently finished cooking as I let it cool on the counter because it firmed up nicely.  After it coold down a bit, place the cheesecake in the refridgerator for 1-2 hours.  Note, the cheesecake puffs up very high and I was worried that I would end up with a huge mound, but as it cooled it fell back down to perfectly fill the crust and leave just enough room for the ganach topping. 

Mint Chocolate Ganache:
1/2 C Half & Half
1/4 C Yogurt
1 C Unsweetened Carob Chips
2 Tbsp Cocoa Powder
1/4 tsp Peppermint Extract

In a saucepan add half & half and yogurt and heat over low heat to just below a simmer.  Add extract, carob chips and cocoa powder and mix until melted.  Set aside and let cool for about 5 minutes.  Don't let it cool too long or it will get too sticky to spread.  Pull the cheesecake out of the fridge and pour the ganach topping on top.  Place directly back into the fridge and cool for 1-2 hours.


Sorry couldn't wait to take a picture before we cut out a slice and had a taste.  It was amazing.  Made for a terrific birthday suprise for my wife.


This slice had approximately 6-8 net carbs in which the majority are from the carob chips, but it was well worth it.  You could leave out the ganache and play with other low carb toppings to reduce the carb count if desired.

Tuesday, May 24, 2011

Low Carb Sushi Rolls


My Opa & Mother-in-Law attended a sushi class and taught us to make our own sushi rolls. This inspired us to try to make sushi rolls at home and we figured we could use low carb cauliflower rice to make the rolls fit into our diet.  I know they showed us the correct techniques for making sushi rolls but I had all sorts of difficulty once I tried it for myself with the cauliflower rice. Some of the techniques I discuss below are self discovered by trial and error and are likely to offend someone who is skilled at making sushi, but I don't care because it tasted amazing.

Ingredients:
Sushi Nori Paper
Low Carb Cauliflower Sushi Rice
Smoked Salmon, Crab, or Sushi Grade Fish
Carrot slivers
Alvacado
Cream Cheese
Soy Sauce
Wasabi

Cauliflower Sushi Rice:
Do not cook the cauliflower first. Grate the raw cauliflower through a small grater or process with the grater blade on the food processor.  Place in a microwavable bowl and cover with plastic wrap.  Nuke for 3 minutes. Mix in 1 Tbsp of rice wine vinegar, 1/2 packet of splenda, & 1/8 tsp xantham gum.


Place one Sushi Nori paper on your cutting board shiny side facing up.  Spoon some "rice" on the paper.
 

Spread the "rice" into a thin layer covering the bottom 3/4 of the paper.

Add your toppings in the center of the rice. Smoked Salmon...

Alvacado slices....

Carrot slivers....

and some cream cheese.

Start to roll the paper from the bottom by folding it over the toppings.

Use your fingers to tuck the end under and roll as tightly as you can.  Stop about 1" from the end and take a dab of soy sauce on your finger and spread it on the exposed 1" of paper to help glue it together.

Start your first cut about 1" to 1-1/4" from the end. Place your index finger on one end of the cut and use your thumb and middle finger to hold the paper on the other end of the cut.  Use a sharp serrated knife to carefully cut the roll into slices.

Serve with soy sauce & wasabi.

Monday, May 16, 2011

Mesquite Grilled Vaquero Fajitas

1 Pkg Beef Skirt Steaks
1 Pkg Chicken Breasts
1 Bottle Italian Dressing
Fajita Seasoning
Salt & Pepper
Minced Garlic
Onion Powder
Juice from 3 Limes
1/4 C Tequila
Sliced Onion
Sliced Bell Pepper

Season the steaks and breasts with salt, pepper, fajita seasoning, and onion powder.  Place them in a bag and add the dressing, garlic, lime juice, and tequila. Place meat in the fridge to marinate at least overnight.  Note, you can marinate then freeze them for later if required.  When ready to cook, light the grill and cook over some hot coals until done.


Heat some oil in a skillet and saute the onions and bell pepper until they are tender.


The chicken can be sliced into strips.  When you slice the steak slice it across the grain (perpendicular to the direction of the grain) and at a diagonal angle (meaning your knife will be at a 45 deg angle from the top of the cutting board).  This will ensure that when you bit into the fajita taco you can easily bit off a tender piece and not end up pulling the entire slice of meat out of the taco.  If you are unsure at how to slice it don't over-think it and instead try a few different directions until you end up with a slice that is very easy to bite off and chew.

For fajita tacos, serve with warm tortillas (low carb), sour cream, grilled onion/bell pepper, guacamole, shredded cheese, and salsa.

Saturday, May 14, 2011

Zucchini Spinach Lasagna

1 lb Ground Italian Sausage
1 lb Ground Turkey
1 Jar Marinara Sauce
Italian Seasoning
Minced Garlic
1 Diced Onion
2 Large Zucchini
2 Cups Shredded Cheese
1 Pkg Cream Cheese
1 Bunch Fresh Spinach (or 1 pkg Frozen Spinach)

I was initially inspired to make a low carb lasagna from some of the other blogs that have made some pretty good looking recipes. I found some delicious low carb lasagna recipes, but I still longed for a low carb replacement for the noodles that would provide the lasagna some body and a noodle like texture between the layers.

In a skillet saute the onions and garlic.  Add the sausage and turkey and brown.  Drain any excess grease and add the marinara sauce and Italian seasoning and reduce heat to a slow simmer.

Take the zucchini and slice them lengthwise as thin as you can, or approximately 1/16" thick.  I would highly recommend a mandolin slicer to get nice thin slices, but you can use a sharp knife as long as you have patience and a steady hand.  Don't fret about having perfect slices, as you can easily piece everything together in the dish.  Note, as seen from the photo below I did not have a mandolin slicer for the zucchini and I could probably use a bit more patience but it pieced together fine.

Spray a 9x13" casserole dish with pam.  Line the bottom of the dish with a layer of zucchini slices.


Then top the zucchini with a layer of the sauce, then some spinach, then some dollops of cream cheese as shown below.


Repeat zucchini, sauce, spinach, cream cheese until you run out or the casserole is full, whichever happens first.  The top layer should be a layer of zucchini slices topped with the shredded cheese.  Place in the oven @350degF for 30 to 45 minutes.  The lasagna should be bubbling and the cheese melted.


Note, this was the point in the experiment that I thought I had failed miserably because as I took it out of the oven I noticed that the zucchini slices had put off a significant amount of water.  I was afraid that all was lost and we would end up with a soupy mess.  This however was one of those mistakes that turned out to be good in the end.  I was able to easily drain all the excess water off of the casserole and I was left with a fairly stable lasagna.  I know, I know...you are not supposed to have to drain lasagna, but trust me, it's worth it.


Slice and serve.  Continue to drain any excess water as needed.  Even though the water is a bit of a pain, the taste of the lasagna was amazing.  The zucchini "noodles" added a good flavor and decent body to the lasagna.  A future experiment (maybe pre-cooking) is planned as an attempt to pull some of the water out of the zucchini prior to assembling the lasagna.

Monday, April 18, 2011

Low Carb Pancakes

To anyone still following my blog, I apologize that the posts have been few and far between.  Since it is hard to find time, I am trying to regularly post one of my favorite recipes or low carb experiements that turn out to be a definate success.  This recipe falls into that catagory since pancakes are generally not going to fall in the low carb catagory.

I experiemented and adapted some low carb pancake recipes I found to come up with a low carb pancake mix that tastes great.


1/4 C Almond Flour
1/4 C Coconut Flour
1/4 C Low Carb Baking Mix (Bob's Red Mill Brand)
2 Tbsp Whey Protein Powder
1/8 tsp Nutmeg
1/4 tsp Cinnamon
1/2 tsp Baking Soda
1/2 tsp Baking Powder
1 tsp Truvia/Erythritol (or preferred sweetener)
1/4 tsp salt
2 Large Eggs
2 Tbsp Coconut Oil, Melted (or melted butter)
2 Tbsp Half and Half (or cream)
1 Cup Coconut Milk (or almond milk)
1/8 tsp vanilla (omit if you are using vanilla flavored whey)

Total Batch = 18-20 Net Carbs
Makes 8-12 Small/Meduim Pancakes @  2-3 Net Carbs Each
Serving Size = 2 Small/Medium Pancakes (4-6 Net Carbs)

Mix the dry ingredients in a bowl.  Beat the eggs in a seperate bowl.  Then add all of the remaining wet ingredients to the eggs except the coconut oil/butter.  Just before you are prepared to mix the wet and dry together add the melted coconut oil/butter to the wet ingredients then add the wet to the dry.  Mix until you have a batter.  If your batter is too thin add some more coconut flour, if it is too thick add some more coconut milk.


I used an electric skillet which I set to 325°F.  Once hot (spritz a few drops of water to verify that it is hot enough, the water should jump around wildly then evaporate quickly) pour approximately 1/4 Cup of batter on the skillet.  Use your spoon to spread the batter into a thin layer otherwise the pancake will end up too thick and won't get done in the center. 


I found that slightly less than 1/4 Cup yielded these nice small pancakes.  Let the pancakes cook until the bubbles on the top start to form and the bottom is browned.  It takes awhile for the pancake to cook enough to be able to flip them without making a mess. 

Cook until browned on the other side then serve.


Low Carb Topping Ideas:
-Peanut Butter
-Over Easy Eggs (if you prefer savory over sweet)
-Sugar Free Syrup
-Low Sugar/No Sugar Added Preserves
-Fruit & Whipped Cream

Thursday, April 7, 2011

Roasted Asparagus

Drop that steamer, put the asparagus on the counter, and slowly step away. Don't even think about putting that lovely asparagus in a steamer or pot of water.  Follow these directions very carefully and nobody will get hurt:

1.  Preheat oven to 400°F.
2.  Wash asparagus and snap off ends.
3.  Lay on a greased cookie sheet and brush with olive oil.
4.  Season with salt, pepper, garlic powder, and ginger powder.
5.  Sprinkle shredded Parmesan cheese on top.


6.  Pop in the oven for 10-20 minutes or until it reaches your desired crispness/tenderness.  (I prefer mine just in between crisp and tender so I usually bake for around 10-12 minutes.

You are now free to enjoy the world of roasted asparagus.  The only downside is that you have likely now learned the "err of your ways" from back in the days of the steamed/boiled asparagus.  I hope you enjoy as much as I have.

Friday, April 1, 2011

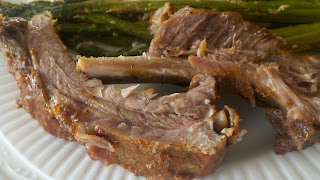
Oven Baked "Fall-off-the-Bone" Baby Back Ribs

Ingredients:
1 Rack Baby Back Ribs
Signature Dry Rub

If you are low carbin', I recommend making your own dry rub since most pork rubs have brown sugar or some kind of sweetener. Just blend together your favorite seasonings to get the desired mix of salty, savory, & spicy flavors.  Besides, making your own dry rub will automatically give you some "street cred" among the Southern BBQ folks. Have fun with it and come up with a catchy name for your signature rub.  If you must have some sweetness, then you can blend in some sugar alcohols or artificial sweetener. Personally, I'll leave the sweet stuff to the folks in Kansas because here in Texas sweet BBQ makes less sense than a screen door on a submarine.

"Art's Country Engineered (We Ain't in Kansas Anymore) Texas Dry Rub Recipe"
1 tsp Salt
2 tsp Black Pepper
1/2 tsp Red Pepper
2 Tbsp Chili Powder
2 tsp Garlic Powder
1 tsp Fajita Seasoning
1/2 tsp Paprika
1 tsp Onion Powder

First remove the tough skin/membrane off of the back of the ribs.  Take a small knife and insert it between the skin and meat (just under the skin) in the center of the rack. Make the slit between two center ribs and cut it deep enough to fit a finger into.  Slide your finger between the skin and meat and pull the skin off of the ribs.  This should enable you to remove the entire membrane in one piece. Might take a bit of muscle, but it should come off without too much struggle. Grunt loudly and finish with a carnivorous roar as you rip off the membrane to make sure you scare your guests a little bit and live up to your newly earned "Street Cred".

Next lay the ribs on a piece of aluminum foil and coat the entire rack of ribs (top/bottom/& sides) with your signature dry rub. 

Wrap the ribs tightly and place in the oven @ 275°F for 3-1/2 to 4 hours. No need to turn them or do anything but wait patiently.


Slice and enjoy.  The meat should be extremely tender and almost falling off the bone. The only downside is you will probably wish you would have done 2 or 3 racks of ribs.

Warning-Don't let too many people know that you cooked the ribs in the oven or you might loose some of that "Street Cred" mentioned earlier.  These ribs might not have that amazing smokey flavor of ribs smoked over a mesquite fire all afternoon, but they are very simple to prepare and are sure to please.

Tuesday, March 22, 2011

Thai Chicken Curry Soup


There isn't much I like more than some Thai curry poured over some rice. Since I can't have the rice, I made this easy curry soup and was impressed with the results.

2 Cans Coconut Milk
2 Cans Chicken Stock
1 tsp minced ginger
1 Tbsp Red Curry Paste
1 Pkg (5-8) Chicken Thighs
1 Red & Yellow Bell Pepper
1 Onion
1 Can Bamboo Shoots drained
1 Zucchini
6 Limes
Cilantro
Fish Sauce
Sriracha Sauce

In a pot add the coconut milk and chicken stock and heat to a simmer.  Add the ginger and curry paste.  Slice the chicken, onion, bell pepper and zucchini into strips (I usually shoot for 2" long x 1/2" wide or less). Add the chicken slowly to the pot and let simmer for a few minutes.  Then add all the vegetables and simmer until they are the desired tenderness.  Reduce heat to low and add 2 Tbsp of fish sauce, 1 tsp Sriracha, and the juice from 1 lime.  Cut the remaining limes into wedges and serve the soup with lime, cilantro, fish sauce, & sriracha for garnish.


Tuesday, March 8, 2011

Sun Dried Tomato, Bacon, Feta, & Spinach Low Carb Quiche

Sun Dried Tomato, Feta Cheese, Spinach, & Bacon Quiche with Low Carb Almond Meal Crust

Almond Meal Crust:
*1-1/2 C Almond Meal or Almond Flour
3 Tbsp Ice Water
4 tsp Olive Oil

*Tip almond meal (w/skins) and almond flour (blanched/skins removed) can be interchanged. You can make your own almond meal by grinding almonds in a food processor or coffee grinder. Make sure you don't grind the almonds too long or you will end up with almond butter. Grind the almonds in steps using a sifter to sift out the flour and returning the larger bits to the grinder.  If you purchase almond meal/flour, I recommend buying it in bulk from Whole Foods/Central Market/Sun Harvest/ect because the per pound cost is generally cheaper. Always store in an airtight container because ground almonds can become rancid.

Mix almond meal/flour and salt.  Above picture is almond flour purchased from Sun Harvest.  Beat olive oil and water and add to almond meal/flour.  Mix until a dough forms.  Add more water or almond meal/flour as required to form a dough ball that is not too dry and not too sticky. 

Spread into a 9" greased pie plate.  Dip your fingers in ice water to keep them from sticking when pressing out your crust. 

Cousins (Merlin & Bailey)
Warning, you likely won't have alot of help during this phase of the project. I caught my helpers sleeping on the job. "Lazy Bums"!!!! Just wait, when this comes out of the oven everyone will be begging.

I recommend covering the edges of the pie with pie covers or just aluminum foil to prevent the edges from burning or getting too dark.  You must exhibit lots of patience if you use aluminum foil, otherwise you will end up very angry because they tend to fall off while placing in the oven.

Bake @350 for 15 to 20 minutes or until it starts to brown.  While the crust is baking work on the filling.

Quiche Filling:
5 Eggs
1/4 C Coconut Milk or Almond Milk
6 to 8 Sundried Tomatoes chopped
1/2 Cup Feta
1 Pkg Frozen Spinach
1 Pkg Bacon

Slice the bacon in 3/8" wide slices and fry until crispy. (If you have read the cast iron post, this would be a good time to use that skillet).  Drain the bacon on paper towels. 

Remove all but 1 Tbsp of bacon grease from the pan and add the spinach and cook until thawed.  Add the sundried tomatoes and cook for another 2 to 3 minutes.  Mix in the bacon and remove from heat.  In a bowl beat the eggs with the coconut/almond milk. 

Pour the spinach mixture into the pie crust.  Add the feta cheese and use a fork to mix the cheese in a bit.  Pour the egg mixture over everything and pop in the oven.  I once again recommend using the covers for the edge.  Remove the covers with about 20 minutes remaining.

Bake quiche 40 to 50 minutes or until eggs are cooked through.  Set out to cool and try to fight off all the hungry people that will be flocking to the kitchen due to the wonderful smell.

I was skeptical of the almond meal crust, but the concensus was that the taste and texture was amazing.  Several comments were that the almond meal crust is preferred over a regular crust.  Try it for yourself.  I'm thinking of using it for a low carb dessert soon. Im open to suggestions.

Tuesday, March 1, 2011

Seared Butterflied Salmon Steaks

I love Salmon but for some reason I had difficulty getting it to cook perfectly.  If you remove it from the skin then it will fall apart.  If you leave the skin on then the skin gets crispy and browned but the rest of the fish doesn't get that great seared crust.  I discovered this technique for cutting and preparing the salmon so that you get a nice crisp crust and a nice flaky center.

Buy a 6 to 9" long piece of fresh salmon fillet. Ask the butcher to cut you off the thickest part of the salmon (try to get the forward most part of the fillet where it is thickest and widest.  Preferably you want the salmon to be at least 1.5" thick.

Butterfly Technique:
Cut the salmon in 2-3" wide strips all the way through the skin.


Then take each piece of salmon and prepare to make another cut 1-1.5" from the edge, directly in the center of the fish. This cut should run lengthwise. When you make this cut, only cut through the flesh down to the skin, but do not cut through the skin.


The fold the salmon in half so that the skin is folded back to back.


Season both sides of the steak with salt, pepper, garlic, and ginger powder. 


Heat up a skillet and put 1 Tbsp olive oil in the pan.  When the oil is hot (just before it starts to smoke), add the steaks to the pan.  Place the steak so the open side of the fold is facing down.  This will allow the fish to sear and help hold the butterflied steaks together nicely.


For medium to well done grill the steaks 2.5 to 3 minutes on each side.  For rare to medium rare grill the steaks for 1.5 to 2 minutes on each side.


You don't have to hassle with removing the salmon from the skin for presentation as it is ready to serve.  It also makes it very easy to eat as you just slide your fork next to the skin to remove the fish bite by bite.